A Simple Guide to Activating Ubuntu Pro in Security Center
Introduction
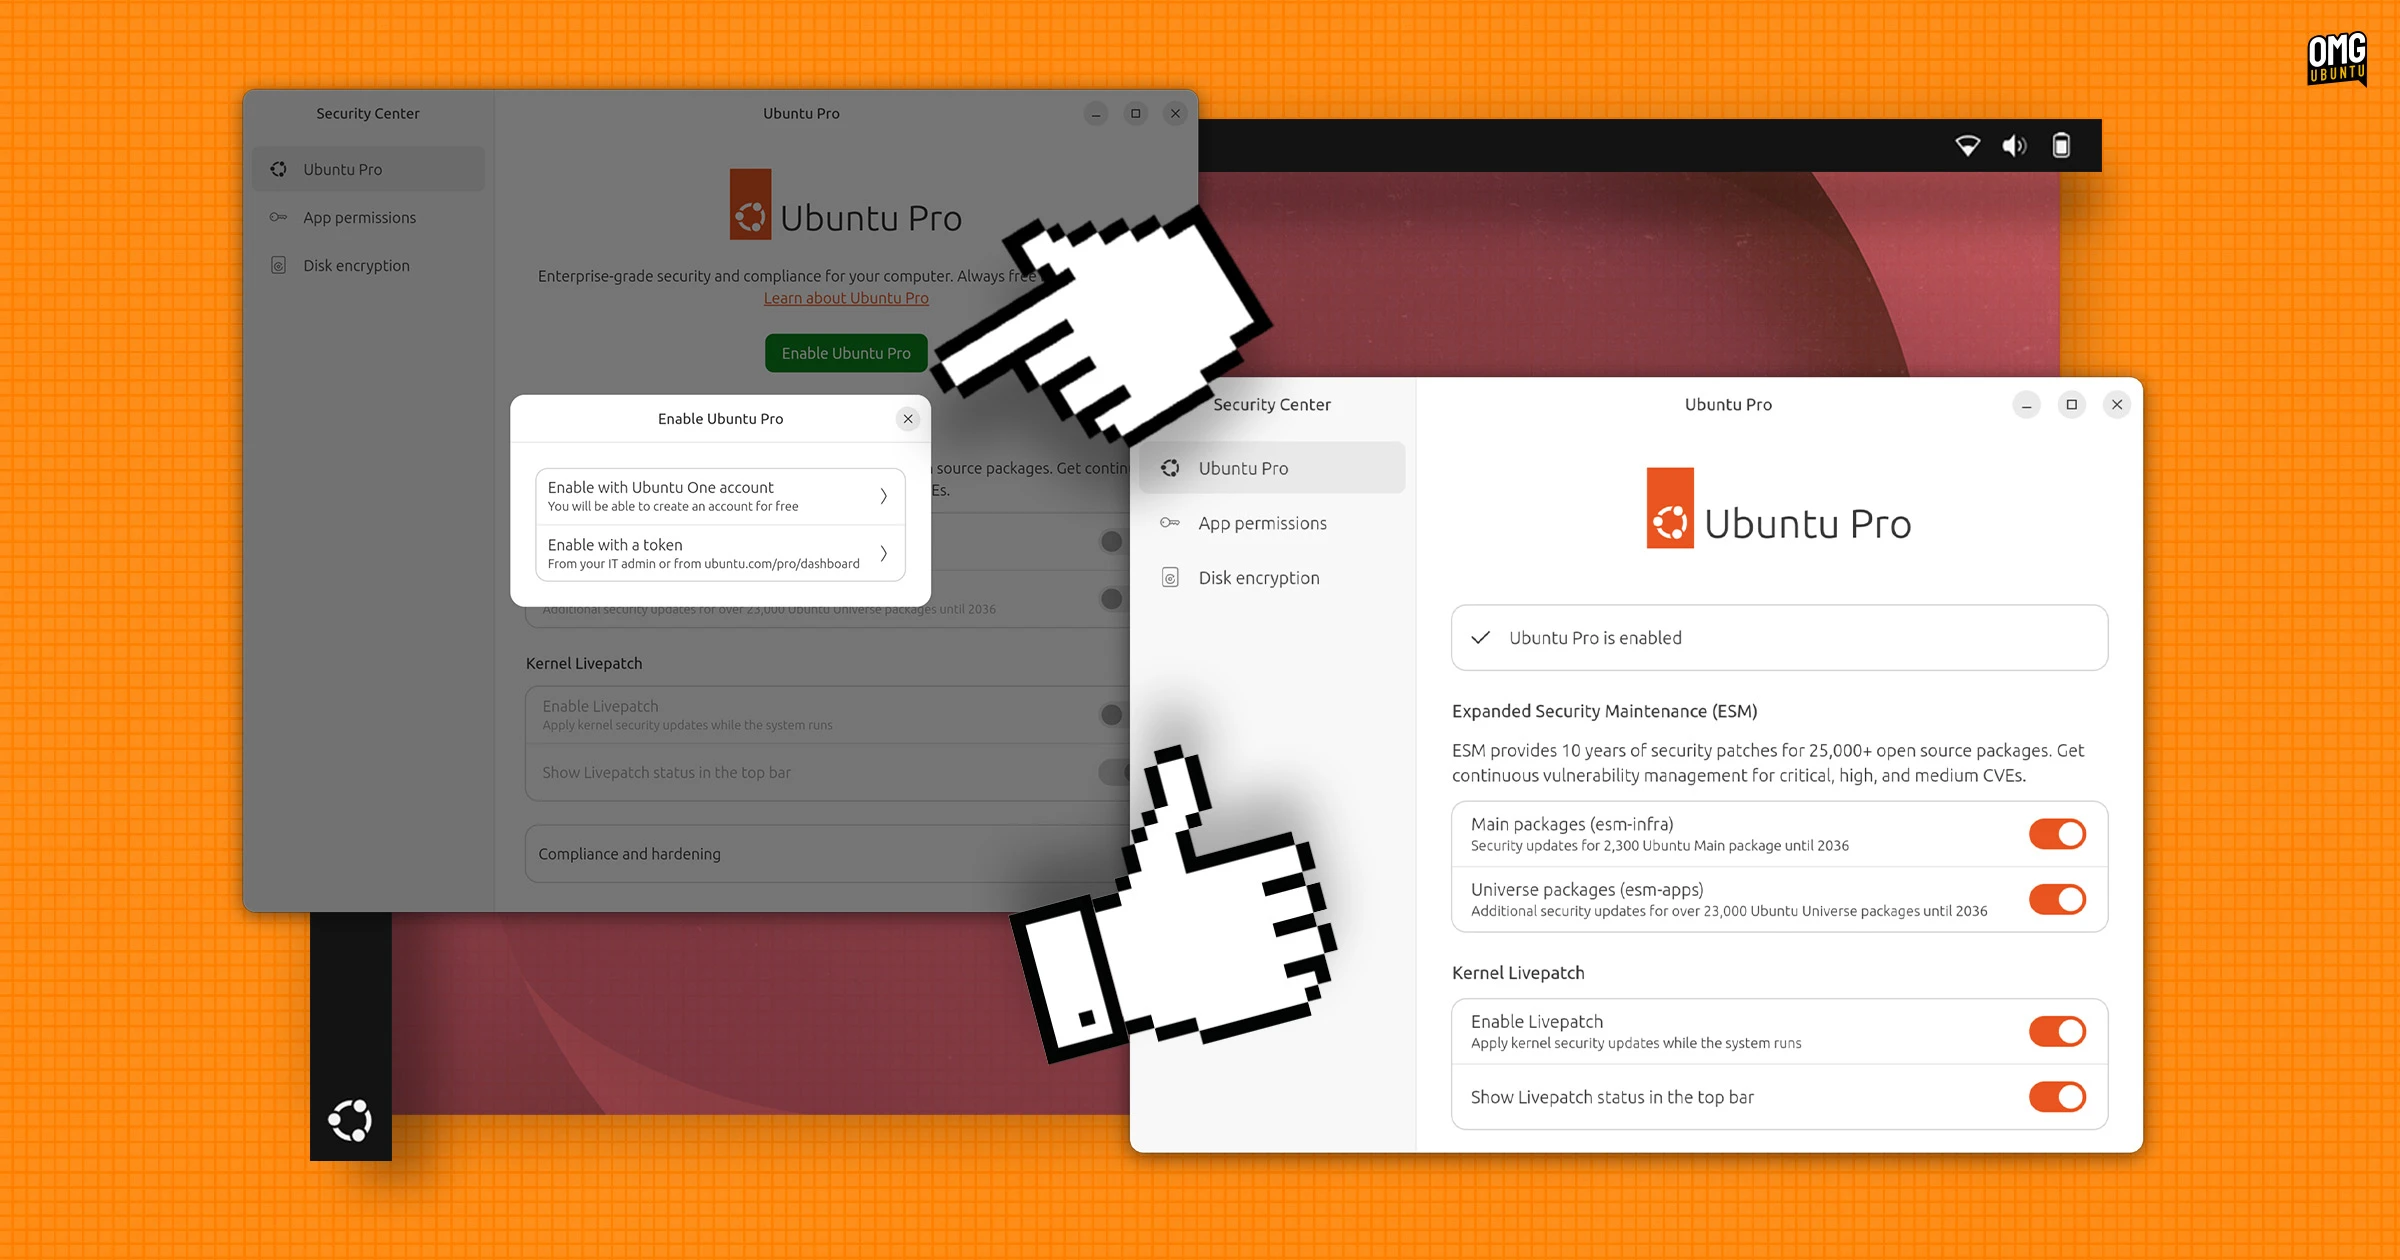
With Ubuntu 26.04 LTS, Canonical moved the Ubuntu Pro configuration from the old Software & Updates utility directly into the Security Center app. This shift streamlines the setup, giving you a cleaner interface with clearer explanations for each toggle. While the underlying options remain largely the same, the new layout feels less cluttered. Whether you're a personal user (with up to five devices free) or managing a business fleet requiring a paid subscription, activating Ubuntu Pro is now simpler than ever. This guide walks you through the process step by step.

What You Need
- Ubuntu 26.04 LTS installed on your machine (the Security Center app is pre-installed by default).
- An internet connection to verify your subscription with Canonical's servers.
- An Ubuntu One account (free) if you're activating the personal free tier.
- A subscription token (provided by Canonical) if you're using a paid plan for business or enterprise.
Step-by-Step Instructions
Step 1: Launch Security Center
Open the Activities overview (press the Super key) and type Security Center. Click the icon that appears. The app gives you a dashboard of security settings, including the Ubuntu Pro section.
Step 2: Locate the Ubuntu Pro Section
In the left sidebar of Security Center, you’ll see an entry labeled Ubuntu Pro. Click it. This opens a page with a summary of your current subscription status and the available actions (e.g., “Enable Ubuntu Pro”).
Step 3: Choose Your Subscription Type
Below the status, you’ll see two main options:
- Personal Use (Free) – For individuals on up to five devices. You’ll need to sign in with your Ubuntu One account.
- Paid Subscription – For businesses, enterprises, or anyone managing multiple machines. Requires a subscription token.
Select the appropriate option based on your needs.
Step 4: Sign In or Enter Token
If you chose the free tier, click Sign In. A web browser will open prompting you to log in with your Ubuntu One credentials. After successful authentication, you’ll be redirected back to Security Center.
If you selected the paid subscription, paste your token into the provided field and click Attach. The token is a long alphanumeric string you received from Canonical when purchasing the plan.
Step 5: Confirm Activation
Once signed in or token attached, the Ubuntu Pro page will update to show your subscription details, such as the number of machines covered and the expiry date. You’ll see a green Enabled badge. That’s it – Ubuntu Pro is now active on your system.
Tips for a Smooth Experience
- Check your internet connection before starting – the whole activation process requires online verification.
- Keep your Ubuntu One password handy if using the free tier; you might be prompted to re‑enter it after a browser redirect.
- For paid subscriptions, double‑check that your token hasn’t expired and is assigned to the correct number of machines.
- If you encounter an error, verify that your system clock is accurate; time sync issues can break the token validation.
- Remember: the old Software & Updates utility is no longer present in Ubuntu 26.04 LTS – all Pro settings live exclusively in Security Center.